|
Our Mural Material Texture, mobility and easy care are three reasons many people like our murals. Our murals are printed on an innovative repositionable woven fabric material that sticks to almost any surface. The material is easy to install, can be removed and re-hung hundreds of time without losing adhesion, leaving a mark, or damaging surfaces. The pre-pasted material allows you to change them from one room to another and keep them when you move. It won't rip or wrinkle and can be pulled apart if it folds over during installation. It will not shrink or curl like other material. This repositionable wall cover is a polyester weave, which gives your mural a slightly textured look. Printed at high-resolution with premium ink for stunning color gamut and accuracy. The print finish includes a matte topcoat varnish for maximum protection. We use precision contour-cut (dye-cut) with state-of-the-art high precision cutters and plotters for seamless installation and great looks. All the materials we use are non-toxic, safe and biodegradable. Large murals are printed in multiple panels and might require two people to install. Great for any smooth wall surface, doors, renters, dorms, bedrooms, offices, refrigerators, kids play areas, reception areas, waiting rooms, halls. Not recommended for high moisture areas, above or near fireplaces and cribs.
Installation Installing Artsider murals is pretty easy and you can do it yourself without requesting professional installation. Basic installation tips
Tools to make installation even easier:
Application Remove your mural from its shipping tube. The mural comes with backing paper, which protects the adhesive. Keep this backing paper on and lay the wall graphic on a flat surface. This will allow the wall graphic to adjust to room temperature and ensure the best installation. Measure and mark your guideline. Try not to let the adhesive come together, or let the material fold up against itself. If it does, separate it by carefully pulling it apart taking care not to damage the printed area.
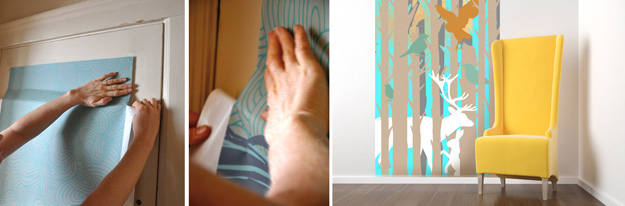
With the help of a friend position the mural on the prepared surface. Start at the top of your print and pull down approximately 2-3” / 5cm of the backing paper. By lightly pressing and smoothing from the centre outwards, apply the exposed adhesive area of your print to the chosen surface. Press down with your flat hand and smooth out any wrinkles or bubbles.
Then continue to slowly peeling the backing paper downward in small increments, pressing and smoothing as you go. Once the process is started it can be easier if another person holds the bottom and pulls down slightly giving some tension, keeping it square and straight, until he mural has been fully installed. Then trim excess material, if necessary.
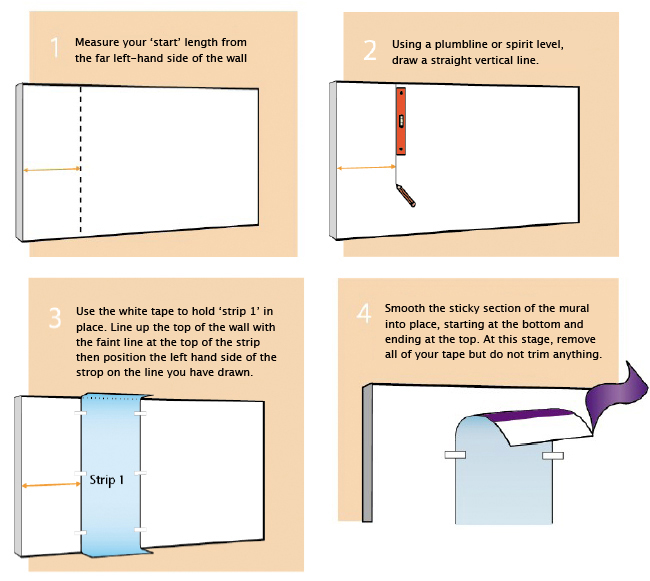
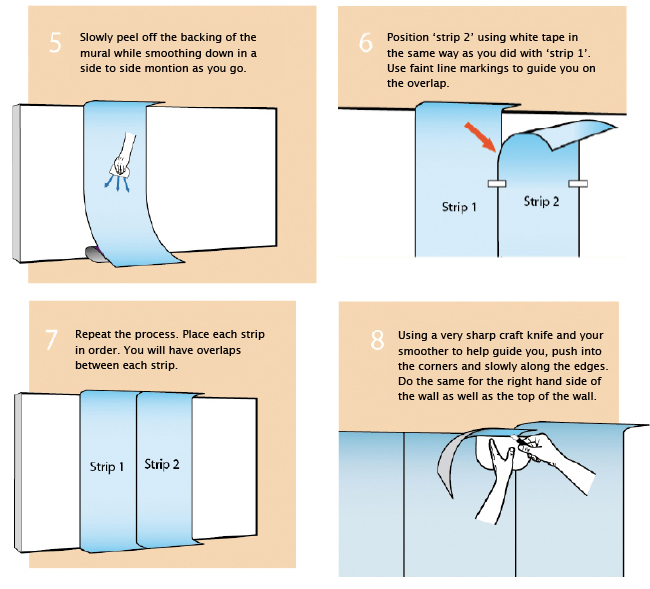
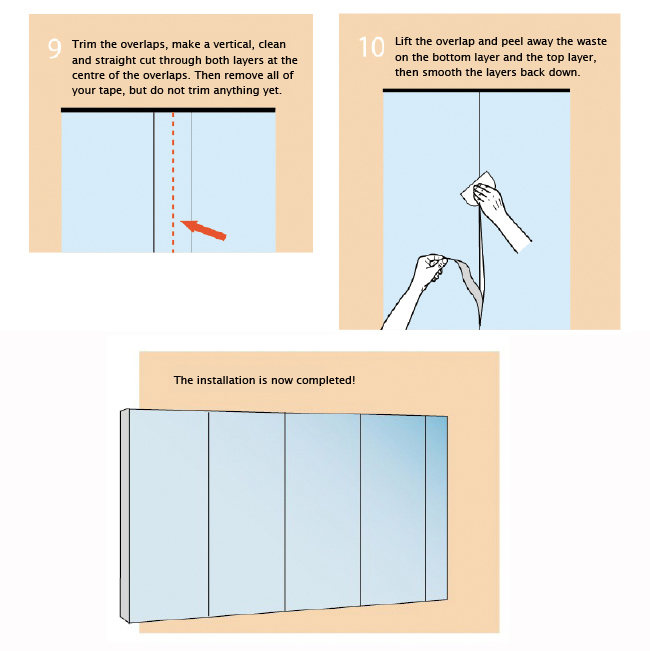
Surfaces and Precautionary Measures It is very important that you allow at least 30 days before adhering the material to a newly painted surface. Bubbles can occur if the paint is still out gassing off. Also make sure all dry wall painted surfaces or a repainted surface have been primed in order to not leave possible adhesive or peel paint upon removal. Not all surfaces are equally strong, some may find that paint can partially chip off when removing the wall decal. We strongly recommend that the material is stuck on a flat, smooth, clean and dry surface for best results. Multi-Panel Installations If your mural is very large it will probably come in multi-panels. The following steps will help you ensure you get the best results.
Looking for a Professional Installer? Our murals are very easy to install and most of our customers install the mural themselves, however, some customers might prefer to have murals professionally installed. You can use the online Professional Paperhanger Database on the National Guild of Professional Paperhangers website to locate a NGPP paperhanger in your area.
Shipping We take proper care to ensure that your mural is protected during shipping. Each mural comes rolled inside a tube and protective wrap in its own unique cardboard box. Our high quality murals will never arrive wrinkled.
Pricing Pricing is based on the square footage you need and each mural has a different price per square feet based on the markup the artist indicated for a particular artwork. To get your final price, go to the mural product page of the artwork you are interested in and enter your surface dimensions. The mural wizard will automatically calculate the price for your custom dimensions. |
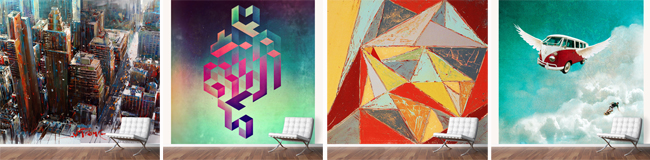
Browse our murals designed by artists from around the world.